

Keep Your Chandeliers Shining Brightly: The Ultimate Maintenance and Cleaning Guide
Chandeliers define interior elegance but require consistent care. Dirt and grease dull their brilliance over time. Proper maintenance ensures optimal light refraction and preserves the fixture's value. Regular upkeep prevents permanent damage to delicate crystals and metals. Understanding material differences is essential for effective cleaning. Correct tools and safety protocols protect your investment while restoring shine.
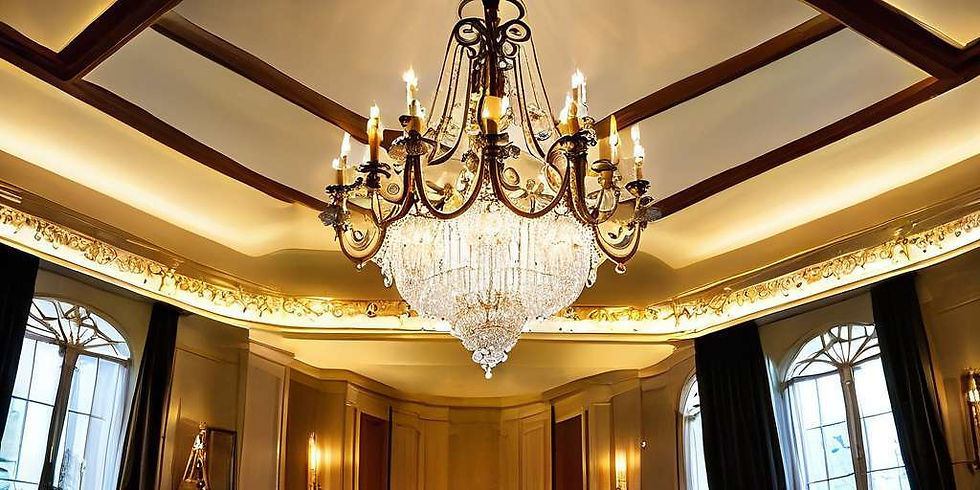
Understanding Chandelier Anatomy and Material Compatibility
Recognizing the specific materials in a fixture is the foundational step for effective preservation. Different substances react uniquely to cleaning agents and environmental factors, making material identification crucial for maintaining optical clarity and structural integrity over time.
The Science of Lead Crystal and Light Refraction
High-end lighting often utilizes lead crystal, a material distinguished by its high lead oxide content. This composition increases the refractive index, allowing the glass to bend and disperse light more effectively than standard glass. The result is a superior "fire" or spectral brilliance that defines luxury interior design. Understanding this optical property explains why even minor surface imperfections significantly impact the overall brightness and sparkle of the fixture.
Identifying High-Quality Crystal Brands
Recognizing premium brands helps homeowners assess the care required for their specific pieces. Manufacturers like Swarovski, Baccarat, and Waterford are synonymous with top-tier lead crystal. These brands are known for precise cutting and high purity levels, which maximize light refraction. Knowing the origin of the crystal can guide decisions on cleaning intensity and the potential need for professional restoration if damages occur.
The Impact of Surface Facets on Cleaning Techniques
The intricate cuts and facets of lead crystal are designed to catch light. However, these surfaces are also prone to accumulating dust and environmental grease. Because the facets are delicate, abrasive cleaning tools can scratch the glass, permanently dulling the refraction capabilities. Cleaning must focus on gentle wiping to remove debris without compromising the microscopic precision of the cuts, ensuring the light continues to scatter efficiently.
Synthetic Glass and Molded Variations
Not all chandeliers use lead crystal. Many modern or budget-friendly fixtures employ synthetic or molded glass. While more affordable, these materials have different physical properties. They generally have a lower refractive index and may not offer the same spectral brilliance as lead crystal. Awareness of this distinction prevents the misuse of harsh chemicals or techniques intended for higher-grade materials.
Distinguishing Between Blow-Molded and Pressed Glass
Understanding the manufacturing process helps in handling the components. Blow-molded glass involves blowing air into molten glass to create shapes, often resulting in unique variations. Pressed glass involves forcing molten glass into a mold, allowing for consistent, mass-produced designs. Both types are fragile and require careful handling, but their uniformity or lack thereof can influence how dust settles and how cleaning tools should be applied to reach all surfaces.
Risks of Acidic Corrosion on Synthetic Materials
While glass is generally resistant to many chemicals, prolonged exposure to strong acids can cause damage. Concentrated vinegar or certain commercial cleaners can etch the surface of synthetic glass over time, creating a permanent matte finish that traps dirt. This corrosion reduces transparency and light transmission. Using mild, pH-neutral solutions is essential to preserve the clarity of these materials without causing chemical wear.
Metal Components: Bronze, Brass, Silver, and Gold
The metal framework of a chandelier supports the crystals and contributes to its aesthetic. Common metals include bronze, brass, silver, and gold. Each metal reacts differently to air, moisture, and cleaning products. Proper identification of the metal type is necessary to select appropriate cleaning agents and prevent irreversible damage such as tarnishing, corrosion, or finish removal.
The Role of Lacquer in Protecting Bronze and Brass
Bronze and brass fixtures are often coated with a clear lacquer to prevent natural oxidation. This protective layer shields the metal from air and humidity, maintaining its shine. However, the lacquer can wear down over time, especially near heat sources like light bulbs. If the lacquer is intact, cleaning should be gentle to avoid scratching the coating. If the lacquer is worn, the underlying metal may be exposed and require more specific care to prevent patina formation.
Addressing Tarnish and Oxidation in Silver Plating
Silver plating is susceptible to tarnishing, which appears as a gray or black discoloration due to the formation of silver sulfide. This reaction occurs when silver is exposed to sulfur compounds in the air. Unlike gold or stainless steel, silver requires regular polishing to remove this layer. Specialized silver polishes or gentle mechanical polishing with a soft cloth are necessary to restore the original luster without damaging the thin silver layer.
Maintenance Strategies for Stainless Steel and Gold Finishes
Stainless steel and gold finishes offer different maintenance profiles. Stainless steel is durable and resistant to rust but can show fingerprints and water spots. Gold, whether solid or plated, does not tarnish but can scratch easily. For stainless steel, microfiber cloths are effective for removing smudges without leaving lint. For gold finishes, soft dry cloths are preferred to prevent scratching, avoiding abrasive materials that could wear away the finish over time.
Essential Safety Protocols Before Cleaning
Before touching any chandelier components, prioritize absolute safety. Chandeliers connect to household electrical systems, creating electrocution risks when using liquids. Proper preparation protects both the user and the fixture from irreversible damage.
Electrical Safety and Power Disconnection
Electrical safety forms the foundation of any cleaning procedure. Chandeliers operate on standard household voltages, typically between 110V and 240V in the United States. Interacting with conductive liquids while power is active poses a severe threat. Turning off the light switch at the wall is a necessary first step, but it is rarely sufficient for deep cleaning.
Using Circuit Breakers vs. Wall Switches
Wall switches only interrupt the hot wire leading to the fixture, which may still leave internal components energized depending on the wiring configuration. For comprehensive safety, locate the home’s main electrical panel. Identify the specific circuit breaker that controls the lighting in the room. Flip the switch to the off position. This method ensures a complete disconnect from the power grid, eliminating any risk of accidental shock during the process.
Verifying Voltage with a Tester
Never assume the power is off based solely on the breaker position. Use a non-contact voltage tester to confirm the absence of electricity. Hold the tester near the wire connections inside the fixture’s canopy or junction box. If the tester remains silent, the circuit is dead. If it alerts, recheck the breaker or consult a qualified electrician. This verification step is critical for preventing accidents.
Thermal Safety and Cool-Down Periods
Heat management is crucial when handling lighting fixtures. Old bulbs and high-wattage lights retain significant thermal energy even after being switched off. Handling hot glass or metal can cause burns or thermal shock, leading to shattered crystals.
Preventing Thermal Shock to Glass Components
Thermal shock occurs when there is a rapid temperature change in a material. Applying cold water or damp cloths to a hot glass crystal can cause it to crack or explode instantly. Always allow the fixture to cool for at least 30 to 60 minutes before beginning any cleaning. This waiting period ensures that all glass elements have reached ambient room temperature.
Safe Handling of Halogen and Incandescent Bulbs
Halogen and incandescent bulbs operate at much higher temperatures than LED alternatives. These bulbs can remain dangerously hot for over an hour after use. Handle these bulbs with care, using a cloth or gloves to avoid skin oils, which can create hot spots and reduce bulb life. If a bulb breaks while hot, allow it to cool completely before cleaning up the fragments to avoid burns or inhalation of hot glass dust.
Workspace Preparation and Protection
Preparing the work area prevents damage to floors and furniture. Cleaning generates inevitable drips, even with controlled techniques. Protecting the surroundings ensures a safer and more manageable cleaning environment.
Securing the Area with Drop Cloths
Spread heavy plastic drop cloths or thick newspapers on the floor beneath the chandelier. Cover an area significantly larger than the fixture’s span to catch any falling debris or cleaning solution. Remove or cover nearby furniture with plastic sheeting. This precaution protects expensive rugs, hardwood floors, and upholstery from water stains, dust, and chemical residues.
Choosing the Right Stable Ladder Type
Select a stable, non-conductive ladder for reaching high fixtures. Aluminum ladders conduct electricity and pose a shock hazard if they accidentally contact live wires. Fiberglass ladders are the preferred choice for electrical work due to their insulation properties. Ensure the ladder is rated for the user’s weight and has non-slip feet. Never stand on chairs or unstable surfaces to reach the fixture, as this increases the risk of falls and breakage.
Selecting the Proper Tools and Cleaning Solutions
Gathering the right equipment is the foundation of safe chandelier maintenance. Using improper tools can scratch delicate surfaces or damage electrical components, while the correct supplies ensure a streak-free finish and protect the structural integrity of the fixture.
Essential Hardware for Dusting and Wiping
The quality of your materials directly impacts the longevity of the crystal and metal components. Standard cleaning cloths often leave behind lint or micro-scratches that trap dirt, making the fixture look duller over time.
Benefits of High-Quality Microfiber Towels
Microfiber is the gold standard for cleaning chandeliers due to its unique electrostatic properties. These towels attract and hold dust, hair, and moisture without the need for harsh chemicals. Unlike cotton or paper towels, microfiber does not shed fibers that could get stuck in the intricate details of the fixture. Using towels of varying colors helps track which side is dirty, ensuring you are always using a clean surface to prevent redepositing grime onto the crystal. The dense weave of high-quality microfiber is gentle enough for soft lead crystal yet effective at lifting oily residues from metal parts.
Using Soft Bristle Brushes for Intricate Details
Dusting is often the most overlooked step, yet it is critical before applying any liquid. Accumulated dust acts like sandpaper if wiped with a wet cloth. Soft bristle brushes, such as those designed for camera lenses or makeup, allow for precise removal of dust from hard-to-reach areas. These tools can navigate between hanging crystals and intricate metal arms without applying pressure that might bend or break fragile components. Dry brushing should always precede wet cleaning to prevent the formation of mud-like streaks that are difficult to remove.
Personal Protective Equipment (PPE)
Maintaining a chandelier involves working at heights and dealing with materials that can irritate the eyes or skin. Protective gear ensures that the cleaning process does not result in injury or the introduction of new contaminants.
The Importance of Safety Goggles
Goggles are a non-negotiable safety item when cleaning overhead fixtures. Dust, dried cleaning solutions, and small loose crystals can fall directly into the eyes during the process. Safety goggles protect against airborne particulates and accidental splashes. They ensure that the cleaner remains focused on the task without the distraction of eye irritation or the risk of corneal abrasion from falling debris.
Preventing Oil Transfer with Nitrile Gloves
Natural skin oils are a primary enemy of chandelier brilliance. Oils from fingers transfer easily to glass and metal, creating a film that attracts dust and causes permanent spotting if not removed immediately. Nitrile gloves provide a barrier that prevents this oil transfer. They also protect the hands from exposure to cleaning agents and sharp metal edges. Cotton gloves are an alternative for very delicate handling, but nitrile offers better resistance to moisture and chemicals.
Effective Cleaning Solutions for Different Surfaces
The chemistry of the cleaning solution must match the material of the chandelier. Using the wrong cleaner can etch glass, discolor metal, or damage protective lacquers. Choosing the right mixture is as important as the tool used to apply it.
Creating a Mild Soap and Distilled Water Mix
A simple mixture of distilled water and a small amount of mild, residue-free dish soap is the safest cleaning solution for most chandelier components. Distilled water is crucial because it lacks the minerals found in tap water, such as calcium and magnesium, which cause hard water spots and cloudy films on crystal. The mild soap breaks down grease and environmental grime without leaving a soapy residue that attracts dirt. The solution should be applied to a damp cloth, not sprayed directly onto the fixture, to minimize moisture exposure to electrical components.
When to Use Isopropyl Alcohol for Crystal
Isopropyl alcohol is particularly effective for high-end crystals like Swarovski, where a streak-free finish is paramount. Alcohol evaporates quickly, leaving no residue and reducing the drying time significantly. This rapid evaporation minimizes the risk of water spots forming as the solution dries. It is also effective at removing oily fingerprints that soap and water might not fully lift. Always apply alcohol to a microfiber cloth rather than directly to the crystal to control the amount of liquid used.
Avoiding Ammonia-Based Commercial Cleaners
Many standard household glass cleaners contain ammonia, which can be detrimental to chandeliers. Ammonia can damage the lacquer coatings on bronze and brass fixtures, causing them to peel or discolor over time. It can also degrade certain types of metal finishes and affect the clarity of glued components in older fixtures. For these reasons, ammonia-based products should be strictly avoided. Opting for ammonia-free solutions preserves the integrity of both the crystal and the metal structure.
Step-by-Step Methodology for Deep Cleaning
Executing a thorough deep clean requires a systematic approach to ensure every component is addressed without risk of damage. This process minimizes the chance of leaving residue or causing scratches by following a logical sequence from dry removal to wet polishing.
Dry Dusting Techniques to Prevent Streaking
The initial phase of any deep cleaning regimen involves the complete removal of loose particulate matter. Attempting to wet-clean a dusty fixture inevitably creates a muddy sludge that is difficult to remove and can permanently stain the finish. Therefore, starting with a dry method is crucial for preserving clarity and brilliance.
The Directional Flow from Top to Bottom
Gravity plays a significant role in how dust settles and how it should be removed. Cleaning must always proceed from the highest point of the chandelier downward. If one starts at the bottom, any dust dislodged from the upper tiers will fall onto the already cleaned lower sections, requiring the entire process to be repeated. This top-down strategy ensures that each pass captures new debris without disturbing previously cleaned areas.
Removing Loose Particles Safely
Using a soft microfiber duster or a clean, dry makeup brush allows for gentle dislodging of dust from intricate crevices. Care must be taken to support any hanging crystals or delicate arms while brushing to prevent them from swinging excessively and potentially colliding with other parts. This gentle agitation lifts the dust rather than pushing it deeper into the facets or metal joints.
Wet Cleaning of Crystal Elements
Once the bulk of the dry dust is removed, the focus shifts to eliminating the finer films of oil, smoke, and atmospheric grime that dull the light refraction of the crystals.
The Wash-and-Dry Method for Individual Pieces
For fixed crystals that cannot be easily removed, the wash-and-dry technique is the most effective manual method. A microfiber cloth is dampened with the appropriate cleaning solution, such as distilled water and mild soap, and thoroughly wrung out to ensure it is barely moist. Each crystal is wrapped individually, allowing the cloth to absorb the dirt rather than spreading it. Immediately after wiping, a second dry microfiber cloth is used to polish the crystal before any moisture can evaporate and leave spots. This immediate dry-off step is critical for maintaining optical clarity.
Drying Techniques to Prevent Water Spots
Air drying is rarely sufficient for high-quality crystal and often results in unsightly water spots, especially if the household water supply is hard. Even with distilled water, traces can remain. Therefore, active drying with a lint-free cloth is necessary. Buffing the crystal in a circular motion with the dry cloth removes any residual moisture and restores the mirror-like finish. This step should be performed for every single piece to ensure uniform brightness across the fixture.
Cleaning Metal Structures and Fixtures
After the crystals are addressed, the metal framework requires specific attention based on its finish. The approach differs significantly depending on whether the metal is lacquered or bare.
Wiping Lacquered Metals Gently
Lacquered bronze, brass, or gold finishes are designed to be protected from direct exposure to air and moisture. These surfaces should be cleaned with a soft, damp cloth using only a mild soap solution. Abrasive pads or harsh chemicals must be avoided as they can strip the lacquer layer, leading to premature tarnishing. A gentle wipe followed by immediate drying with a soft cloth is sufficient to maintain the protective coating and the underlying metal’s luster.
Polishing Unlacquered Brass or Bronze
Unlacquered metals are porous and interact directly with the environment, meaning they will naturally develop a patina over time. For those who prefer a bright, shiny appearance, specialized metal polishes are required. A small amount of polish is applied with a soft cloth, rubbed gently along the grain of the metal, and then buffed to a shine. This process removes oxidation and restores the metallic glow. It is important to note that this maintenance must be repeated more frequently than lacquered variants.
Maintenance of Light Bulbs and Sockets
Light output is significantly impacted by the cleanliness of the bulbs themselves. Dirty bulbs can reduce illumination efficiency by up to thirty percent, making this often-overlooked step essential for maintaining the overall brightness of the room.
Safely Cleaning Bulb Surfaces
With the power already cut and bulbs cooled, each bulb should be wiped with a dry or slightly alcohol-dampened microfiber cloth. Alcohol evaporates quickly, reducing the risk of thermal shock. It is vital to handle the bulbs with care, avoiding pressure that could crack the glass. Removing the fingerprint oils and accumulated dust ensures that maximum light is transmitted into the room.
Dusting Internal Socket Compartments
Dust tends to accumulate in the recessed areas where the bulb meets the socket. Using a dry, soft brush, one can carefully remove this debris. This not only improves aesthetics but also helps prevent heat buildup and potential electrical issues. Ensuring these compartments are free of dust contributes to the longevity of the electrical components and the safety of the fixture.
Advanced Techniques for Large or Fixed Installations
High ceilings and massive fixtures often present unique challenges that standard cleaning methods cannot address. Handling these installations requires specialized approaches to ensure safety and effectiveness without risking damage to the structure or the surrounding property.
Cleaning Without Dismantling
For chandeliers mounted on vaulted ceilings or in atriums, removing components is often impractical due to structural complexity or height constraints. Homeowners must rely on non-invasive techniques to maintain brilliance.
Using Extended Reach Microfiber Tools
Specialized extendable poles equipped with soft microfiber attachments allow for safe access to high-hanging crystals. These tools enable users to gently wipe surfaces from a distance, minimizing physical strain and reducing the risk of accidental knocks. The key is to ensure the microfiber is secure and does not shed, as loose fibers can become trapped in the fixture’s intricate framework. Users should work systematically, moving from the top tiers down to prevent dust from settling on already cleaned sections.
Managing Drip Risks in High Ceilings
When working at significant heights, preventing water or cleaning solution from dripping onto floors, furniture, or walls is critical. Even a small leak from an upper tier can cause significant damage below. It is advisable to use barely damp cloths rather than wet ones, wringing out any excess moisture thoroughly before application. Additionally, positioning a large tarp or drop cloth directly beneath the fixture provides a secondary layer of protection against unexpected drips during the cleaning process.
Professional Methods and Their Limitations
While DIY methods suffice for many, certain situations demand professional intervention. Understanding the limitations of common tools helps prevent irreversible damage to antique or delicate finishes.
The Risks of Steam Cleaning Old Lacquers
Steam cleaners are powerful for removing heavy grime, but they pose a severe threat to chandeliers with aged or original lacquer coatings. The intense heat and moisture can soften the lacquer, causing it to peel or cloud permanently. This risk is particularly high in historic homes where the fixture may retain its factory finish. Homeowners should avoid steam cleaning unless the manufacturer explicitly guarantees the finish can withstand such treatment.
Establishing a Preventive Maintenance Schedule
A consistent care routine preserves the brilliance of crystal and metal components, preventing irreversible damage from accumulated grime or environmental factors. Regular upkeep ensures long-term aesthetic appeal and functional integrity for any lighting fixture.
Routine Dusting Frequency
Weekly or Bi-Weekly Upkeep Strategies
Dust accumulation acts as a dulling agent, capturing moisture and oils that eventually bond to delicate surfaces. A lightweight, dry dusting performed every two weeks removes loose particles before they settle deeply into facets or crevices. This simple step prevents the need for aggressive wet cleaning methods later, which can pose risks to lacquered metals or untreated glass. Using a soft microfiber cloth or a dedicated chandelier duster ensures that static electricity does not attract more debris. The goal is to maintain a baseline of cleanliness that keeps the fixture looking fresh without requiring intensive labor.
Deep Cleaning Intervals Based on Environment
Adjusting for Coastal Salinity and Humidity
Living near the coast introduces salt particles into the air, which settle on chandeliers and accelerate corrosion on metal parts. In these high-humidity environments, deep cleaning should occur every three to four months to remove saline deposits before they cause pitting or rust. The combination of moisture and salt creates a corrosive environment that standard dry dusting cannot address. Inspecting metal joints and crystal hooks for early signs of whitish residue allows for immediate intervention. Maintaining a stricter schedule in coastal regions protects the structural integrity of the fixture and preserves the shine of the crystal by preventing etching from mineral buildup.
Managing Smoke and Nicotine Residue in High-Traffic Areas
Homes with smokers or high foot traffic experience faster accumulation of yellowish, sticky residues on both crystal and metal surfaces. Nicotine and smoke particles adhere strongly to the facets, altering the light refraction and creating a dull, aged appearance. In these settings, a thorough deep cleaning should be conducted quarterly to remove these oils before they become permanent stains. The residue not only dims the light output but can also discolor lacquered metals over time. Regular intervals ensure that the chandelier retains its original clarity and color, preventing the costly need for professional restoration or part replacement due to heavy soiling.
Troubleshooting Common Chandelier Issues
Even with diligent care, chandeliers may develop specific problems over time. Addressing these issues promptly prevents further damage and maintains the fixture’s aesthetic appeal and safety.
Removing Hard Water Stains and Mineral Deposits
Using Vinegar Solutions Correctly
Hard water stains appear as white, circular marks on crystal surfaces, resulting from mineral buildup. Friction with abrasive materials worsens the issue. A diluted white vinegar solution effectively dissolves these deposits. Apply the mixture directly to the affected area and allow it to sit for five to ten minutes. Subsequent rinsing with distilled water removes the residue, restoring clarity without scratching the crystal.
When Professional Polishing is Required
Old, entrenched stains may not respond to home remedies. In such cases, professional polishing or component replacement becomes necessary. Attempting aggressive DIY removal can permanently cloud the crystal. Specialists possess the tools and expertise to restore the original finish safely.
Addressing Rust and Metal Corrosion
Treating Early Stage Oxidation
Early oxidation on metal components requires immediate attention. Treat rust on iron or steel parts using a dedicated rust remover or a mild baking soda paste. Gentle polishing removes surface corrosion. Consistent maintenance prevents the spread of oxidation to other metal areas, preserving the structural and visual integrity of the fixture.
Assessing Structural Integrity Risks
Severe corrosion can compromise the safety of the chandelier. If rust has perforated metal parts, the structural stability is at risk. Such components must be replaced by a professional. Ignoring significant corrosion poses a serious safety hazard, potentially leading to fixture failure or falling debris.
Handling Broken Crystals
Why Glue Should Never Be Used
Broken crystals should never be repaired with common adhesives. Glue distorts light refraction and creates visible imperfections. These repairs detract from the chandelier’s elegance and may diminish its value. Proper restoration requires professional assessment and replacement.
Sourcing Replacement Components
Replacing damaged crystals ensures optimal light performance and appearance. Specialized services can cut and match replacement pieces to the original design. Sourcing authentic components maintains the historical and aesthetic consistency of the fixture. Proper replacement preserves the chandelier’s integrity and visual impact.
Diagnosing Electrical Flickering
Identifying Loose Connections
Electrical flickering often indicates loose connections within the fixture or the electrical box. Heat generated by the chandelier can gradually loosen these connections over time. This issue is not related to dirt or cleaning but represents an electrical fault. Incorrect handling can exacerbate the problem.
When to Call a Licensed Electrician
Electrical repairs require professional expertise. If flickering persists after bulb replacement and visual inspection, consult a licensed electrician. Attempting DIY electrical repairs poses fire and shock risks. Professional intervention ensures safe and effective resolution of electrical issues.


Comments